Showing posts with label Veg. Show all posts

Monday, 11 June 2018


Ingredients for chole:

Black chickpeas – 1 and ½ cups
Chopped onion – ½ cup
Ginger-garlic paste – 2 tsp
Salt
Tomato puree – ½ cup
Turmaric powder – 1 tsp
Red chilli powder –1 tsp
Chana masala – 1 tbsp
Garammasala powder – 1 tsp
Chopped coriander leaves – ½ cup
Chopped green chilli – 2 tbsp
Cumin seeds – 1 tsp
Lemon juice – 1 tsp
Oil – 2 tbsp
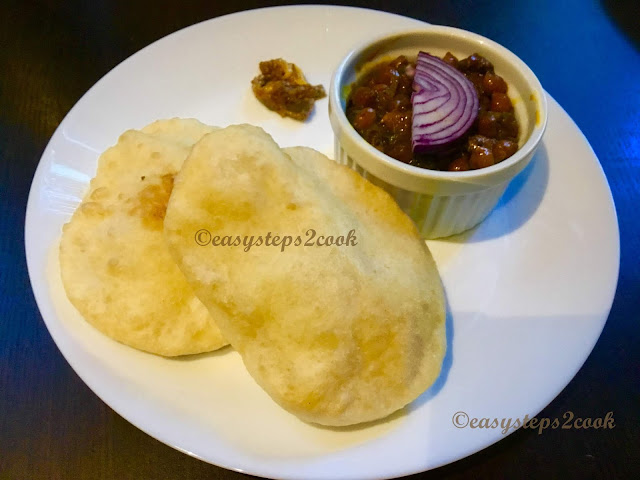
bature with chole or chana
Chole Bature

Recipe for Chole:

Soak the chickpeas for 4-5 hours, then boil it with some water.
After boiling strain the chickpeas from water and keep the water aside. We will use that water for gravy.
Heat oil in a pan and put cumin seeds.
When you start getting the aroma of cumin, add chopped onion and fry it.
After that add ginger-garlic paste and fry it.
Add tomato puree, turmeric and red chilli powder and stir it.
Add boiled chickpeas and salt.
Mix it and add chana masala powder, coriander leaves and chopped green chilli.
Stir it gently and add the water (used for boiling chana) that you kept aside.
Let it boil for 5 minutes and sprinkle few drops of lemon juice.


Ingredients for Bature

Flour – 2 cups
Rawa (semolina) – 1/4 cup
Yogurt – 1cup
Baking soda – 1/4tsp
Salt
Oil – 2 tbsp
Oil – for deep frying

Recipe for Bature:

Take a large mixing bowl and mix all dry ingredients. Now add 2 tbsp oil and mix it. Now add yogurt and knead it and make a dough. I did not use any water to make the dough. Cover the dough with a wet kitchen towel and keep aside for 45 minutes or allow to raise it to double.
Form this quantity of dough you can make 10 bature. So from this dough make 10 balls.
Heat oil in a pan for deep frying the bature. On other hand roll out the ball and make some puri, try to give it oval shape, for rolling you can use dry flour or oil, I used oil. Now fry it.

Serve with hot bature with chana, pickle and salad.

Tuesday, 1 May 2018


Sandesh is a famous Bengali sweet. And this time I am presenting it with famous Belgian chocolate. Out of Kolkata it is very difficult to get good sandesh in shops but you can make it on your own and relish with your family. Already I had shared few famous sandesh recipes with you. Now time to share something different. Currently I am in chocolate country Belgium. So I tried some fusion with sandesh and Belgian chocolate. Actually few days back one of my friend suggested me …”when you are in Belgium, you should try some fusion with Belgian chocolate and our sandesh”. And I really liked his words. As a result I tried it and this came out mind-blowing. Thanks to my friend for that wonderful suggestion.
Now your turn, please try it and I am also waiting for your feedback.


Sandesh with Belgium chocolate
Chocolate Truffle Sandesh

Ingredients:

Milk – 1 ltr
Sugar – 2/3 cup
Lemon juice – 2 tsp

For truffle:

Choco chips or any plain chocolate bar (without dry fruits) – 100 gmsFresh cream – 50 mlFor decoration: 
Choco chipsDry fruits

Recipe:

Heat milk in a vessel and then add a few drops of lemon juice. As a result the milk will scramble and turn into chenna (paneer or cottage cheese) and will look like spongy lumps. Then strain water and keep chenna in a bowl. Now add sugar and mix it very well to make a smooth creamy texture. Now put it in a non -stick pan and stir in low flame for 5 minutes. When the dough is separated from the pan remove it from flame. Now keep it in a plate. Mix it very well. The dough should be used immediately to make round shapes of sandesh.

How to make truffle:
Take chocolate bar (I have used choco chips). Then heat 50 ml fresh cream in a pan but do not boil it. So the ratio I used for truffle is 2:1 for truffle. Now take a pan with some water and keep a bowl on the pan, the bowl bottom can touch the water. This process is called double boiler. Put chocolate in the bowl and heat it in low flame. As a result chocolate will melt and add fresh cream. Stir it. Now truffle is ready.

Now you have to stuff the truffle in the sandesh. This process is just like kachori or other stuff recipe. Take a sandesh and make a hole and put some truffle and again make round sandesh with help of your palm. Decorate with some chocochips and dry fruits.

When you give round shape to the sandesh after stuffing, please be careful and use your clean hand otherwise chocolate will be smeared on sandesh and obiviously it will not look good.

Sunday, 15 April 2018


poila boishakh, nabonorsho, cake art, fondant
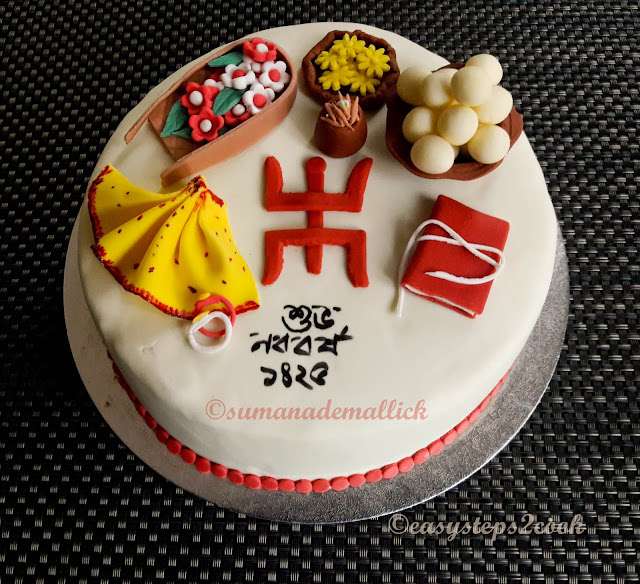
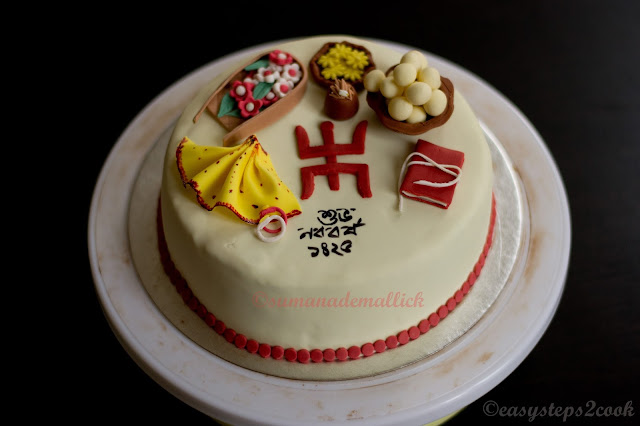
Poila Boishakh theme cake

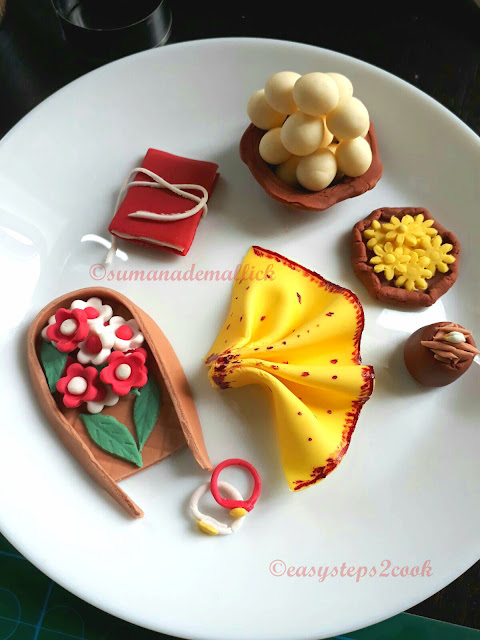
Subho nabobarsho 1425…..poila boisakh means Bengali new year started today. This day obviously very special to all Bengali. Actually Bengalis are very fond of food and festival and we wait throughout the year for our famous Durgapuja. But we have lots of occasions to celebrate with some sumptuous food and rituals. Poila boisakh is just one of them. In Bengali we have a famous proverb “bangalir baro mas e tero parbon”(in 12 months Bengalis have 13 festivals) and Poila Boisakh is the first festival of the year. How we celebrate this day…..generally in Bengal in this day maximum shops start their new account with some puja, which is called khata puja and that khata (book of account) is very special, that comes with red cover and knot with a thread, called ‘kheror khata’. Now a days so many people stay out of Bengal for their jobs. So they always try to make a gathering with their Bong friends with some cultural programmes.
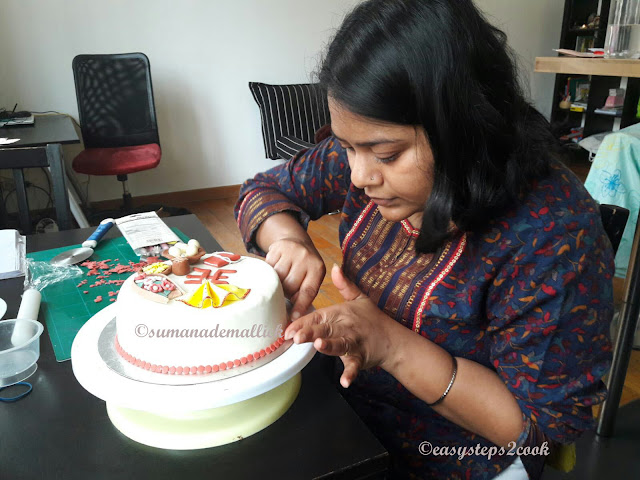
Nabo Borsho theme cake toppings created with fondant

Crafting Nabo Borsho theme cake


Nabo borsho themed cake art with fondant
Poila Boishakh/ Nabo borsho theme cake art

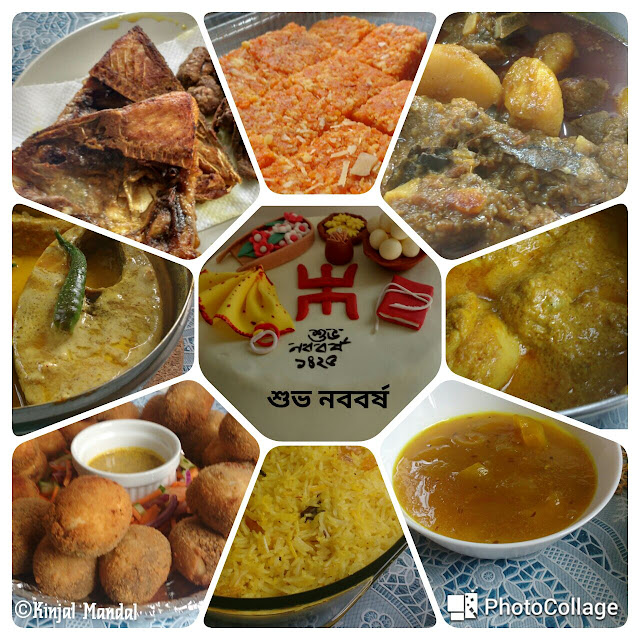
For the last 10 years I am also out of Bengal, even out of India. So we also celebrate our Poila Boisakh with some bong friends with some mouthwatering dishes. And this time I made a cake on Poila Boisakh theme, where I tried to present few stuffs related to the occasion. As the gathering was arranged with the famous pot-luck concept, along with my cake, there were many mouthwatering traditional Bengali dishes brought by my friends. The menu includes dimer devil, Bengali pulao, chicken curry, mutton curry, bhapa ilish, amer chatni. The food was well accompanied by famous Bong adda with card games (taser adda). Overall, it was a fantastic day spent with some adorable friends. We enjoyed it thoroughly.
nabo borsho special menu
Poila Boishakh menu; PC: KInjal Mandal

One of the pic in this post is taken by my friend Kinjal.

Subho Naboborsho!!

Thursday, 28 December 2017

A few days ago when I was thinking about what can I try new that is simple but elegant, mouth watering but does not take much effort, I decided to try eggplant rollatini. This veggy dish, with its cheesy goodness of ricotta, mozarella and parmesan turned out to be super hit with my hubby and daughter. Both of them instantly requested me to repeat the dish as soon as possible. The aroma of this Italian delicacy is just irresistible. The mix of baked brinjal with tomato puree and the cheese was complementing each other perfectly. This is a perfect dish to make your children start eating brinjal if they do not like this vegetable. Please let me know how it turned out at your end. 

Ingredients:

Eggplant/brinjal - 1 medium
Salt
Pepper
Ricotta cheese -1 cup
Olive oil -1 tbsp
125 gms canned tomato puree
Chopped parsley-1 tbsp
Minced garlic -3 cloves
Egg - 1
Mozzarella cheese -3/4 cup
Parmesan greeted -1/4 cup


Recipe:

Cut the eggplant stem and end portion.
Cut the eggplant lengthwise  into 1/4 inch thick slices.
Arrange these slices on the baking tray and drizzle some oil’ salt and pepper.
Use baking sheet this time and bake it in 200c for 15 mins in preheated oven.
Take a mixing bowl and put ricotta cheese, chopped garlic, egg, chopped parsley, 1/4 cup mozzarella and Parmesan. 
Now take a bake proof tray and make a bed with tomato.
Take one baked eggplant slice and put some cheese mix and role it and place it on the tomato bed.
Make all of them one by one and place them on the bed.
Then again put some tomato on the eggplant role and cover with the remaining mozzarella.
Bake it again 15/20 mins in 200c.
Serve hot.

Sunday, 26 November 2017

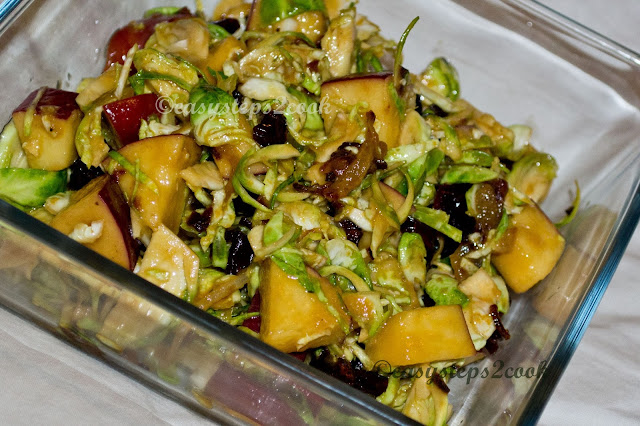
Few months back we shifted to Brussels for my husband’s job. So before coming here I was very excited for the new place and obviously their food. And that time one day I was checking the local fruits and vegetables of this place and learnt about Brussels sprout. When I saw it for the first time, I was super excited to taste this veggie. From the very first day I was looking for this veggie each and everywhere but didn’t get. One day I got it a frozen pack of this in a supermarket but I was looking for the fresh one. Generally I don’t like to eat frozen things but sometimes we are helpless.Two weeks ago I got this finally from a local market and now everywhere we are getting this as this is the season. Now I am happy and make some new dishes with it. This salad is one of them. This is super easy and hope you will also like this recipe.

Ingredients:

Brussels sprout - 10 pcs
Apple - 1/2
Cranberry - 1 hands full 
Salt
Saya sauce - 2tsp
Honey - 1tsp 
Dizon mustard - 1tsp
Olive oil - 1tbsp
Black pepper crushed -1/2tsp
Lemon juice - 1tsp
Brussels Sprout Salad with Apple and Cranberry
Brussels Sprout Salad with Apple and Cranberry caption

Recipe: 

Chop the Brussels sprouts.
Take apple and cut into cube pieces.
Take a bowl and mix all ingredients except Brussels sprouts, apple and cranberry.this is salads dressing. 
Take a mixing bowl and put all fruits and veggies and add the dressing.

Just mix the vegetables and dressing and serve.

Sunday, 22 October 2017

Last Sunday my husband bought so much of fruits from market including lots of pears. And I am absolutely clueless what can I do with all these fruits. So I decided to make some salad with pears. This pears salad had an amazing taste. Not like a typical salad. It was little tangy on the other hand little sweet. And when I was putting lemon juice, got an idea and put little bit of lemon zest also and I think these ingredients make this salad more tasty.

Ingredients:

Pears - 1 small 
Cucumber - 4 inches
Tomato - 1/2 medium
Lettuce - 4 leaves
Black olive slices - 1tbsp
Roasted almond - 8-10

Ingredients for dressing:

Olive oil -1tbsp
Salad seasoning mix - 1tsp
Lemon juice - 1tsp
Lemon zest - 1tsp
Honey -1tsp
Salt 

Tangy fruit salad with pears
Pears Almond Salad

Recipe:

Take a mixing bowl and put all ingredients for dressing. 
Mix all of them together and keep aside.
Your salad dressing is ready.
Now cut cucumber and pears into slices.
Cut tomato into julienne cut, if you have cherry tomato use that. It will look better. I didn't have at that time, so I couldn't use.
Cut the lettuce roughly.
Now take a serving plate and make a bed with lettuce.
Then put cucumber - pears - tomato - olive slices.
Sprinkle the dressing on top of the vegetables.
Lastly add roasted almond.
If you want to make this salad you can make it early but don't put almond. Add almonds just before serving, otherwise the almonds will loose their crunchiness.


Sunday, 8 October 2017

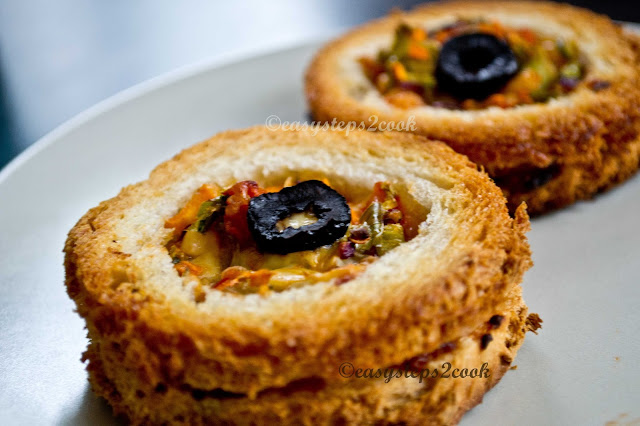
This is a very yummy snacks recipe. First time I made for my daughter’s evening snacks and she liked it. Then I decided to make for one potluck party and there it was finished just like a hot cake. Not only kids’, elders also liked it. Then I decided to share in my blog. Most importantly it is very healthy and low calorie snacks because it is baked and made with lot of vegetables.
Actually “canapé” is a small piece of bread with some savory toppings, served with drinks at party. This is generally a cracker topped and a type of finger food.
bread canapes with mixed vegetablr
Mixed Vegetables Bread Canapes

Ingredients:

Bread slices – 12 pcs
Chopped onion – 1tbsp
Chopped tomato without seeds – 1 tbsp
Chopped capsicum – 1tbsp
Chopped carrot – 1 tbsp
Sweet corn – 1tbsp
Chopped parsley – 1tsp
Chilli flakes – 1tsp or as per taste
Black pepper powder – as per taste
Salt
Grated cheese – 4/5 tbsp
Butter – 1 tbsp
Tomato ketch up – 3tbsp
Oregano – ½ tsp
Black olives – 6/7 slices
Oil – for brushing
yummy snacks recipe with bread and mixed vegetables
Mixed Vegetables Bread Canapes

Recipe:

1.      Take a bowl and put butter, 1tbsp tomato ketch up and grated cheese 1 tbsp and mix together. This is the spread.
2.      Take another mixing bowl and put all chopped vegetables, parsley, chilli flakes, pepper powder, salt, oregano and mix well. This is the filling of canapés.
3.      Now cut the bread slices in round shape with the help of a sharp edge glass or bowl or cookie cutter if you have.
4.      Now take half of the slices and cut the middle of the piece in round shape with the help of a smaller cookie cutter or sharp edged bowl. This will look like donut or a disc with a whole.  
5.      So you will get six pairs from 12 bread slices. Each pair will have once round shaped slice and one donut or disc shaped slice.
6.      Take one bread slice and spread the ketchup – butter spread prepared earlier.
7.      Now keep one disc slice on the bread and put some filling in the middle of the disc. Just lightly press once with your palm from top otherwise there will be a chance to detach both slices.
8.      Make more 5 canapes like this way.
9.      On the top of the canapes put some grated cheese and place an olive slice.
10.  Now brush some oil on the edges of the bread.
11.  Bake them into 200c preheated oven for 8/10 minutes or till the breads turn golden.
12.  Serve hot.


Wednesday, 13 September 2017

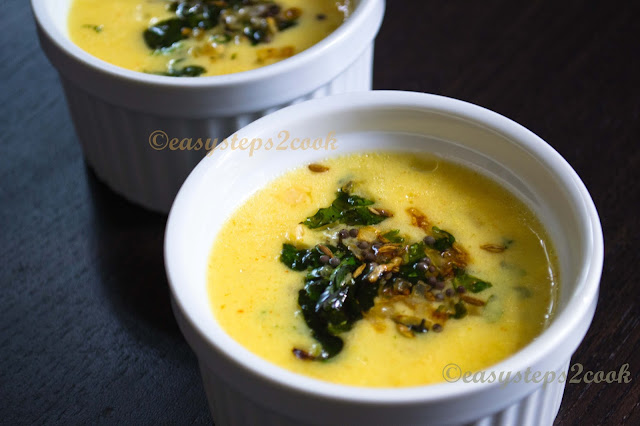
Kadhi is a combination of yogurt and gram flour, which is very popular side dish in western belt in India like Maharashtra, Gujarat, Rajasthan and Punjab. I had spent few years in Maharashtra, so I was able to learn some Maharashtrian dish from my friends there. And this Kadhi recipe is one of them from the list. I found this dish very tasty and easy to make as well as healthy. Sometimes my little one refuses to eat yogurt, but she happily eats it as she likes Kadhi. So we both are happy. 

In Maharashtra I saw this is just a combination of yogurt and gram flour or besan. But in Punjab it is little different, they generally put pakoras (fritters) in kadhi. While making kadhi, the measurement of gram flour is very important. Do not put too much of besan, this will affect the taste. For the ingredients required for tempering, I did not mention measurement because this will depend on your taste.


Ingredients:

Yogurt – 125 gms
Gram flour / besan – 1 tbsp
Water – 125 ml
Turmeric powder – 1 pinch (optional)
Paprika powder – ¼ tsp (optional)
Salt
For tempering:
Mustard seeds – 1tsp
Cumin seeds – 1tsp
Chopped green chilli
Chopped coriander leaves
Curry leaves – 8/10
Dry red chilli – 2 pcs
Chopped onion – 1 tbsp
Chopped garlic – 1 tsp
Oil/ghee - 2 tbsp

Recipe:

First take a mixing bowl and mix yogurt, besan and water. Whisk then and add salt, turmeric powder and chilli powder. You can use electric blender for good result, I personally like to use this option. Blending mixture should be smooth, don’t allow it to form lump.
Now take a heavy bottom pan and pour this mixture and keep it in medium flame. Continuously stir it otherwise it will be stuck in the pan and also will start forming lump.
When it starts thickening or you see it starts bubbling, this means your curry is ready. Take it out from the flame and add some chopped coriander leaves.

Now 2nd step for tempering:
Take a pan and heat oil or ghee.
Put cumin and mustard seeds.
Allow them to crackers and add dry red chilli.
Wait a few moment and add curry leaves, chopped onion and garlic and sauté them.
Add chopped green chilli.
Just sauté it and when they will start to change colour take out from flame.
Immediately pour into Kadhi.
Your Kadhi is now ready. Serve hot with rice or roti.

Do not forget to let me know how it turns out at your end. Happy cooking.

Saturday, 29 July 2017

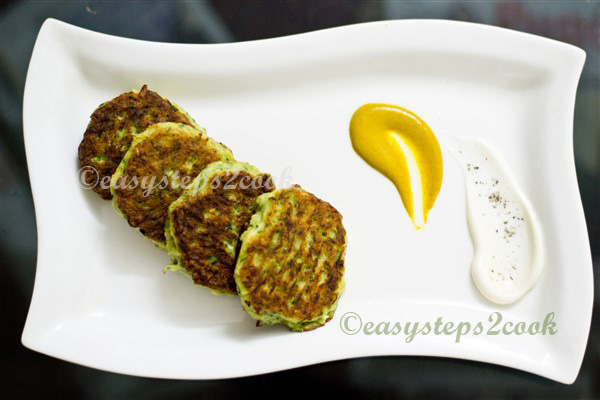
Zucchini Fritters is one of my daughter’s favorite snacks. She is always ready to eat it. And I am also ready to make this because this is very healthy, tasty as well as low calorie. It is really very easy to make with very few ingredients. If u r vegetarian u can avoid the egg. If you are not calorie conscious you can make it deep fried but as per my recipe it is pan-fried because me and my family like it.

Ingredients:

Zucchini -1 large
Chopped garlic – 1tsp
Olive oil – 1 tbsp
Egg – 1
Black pepper – crushed
Corn flour _ 2 tbsp
All-purpose flour – 2 tbsp
Salt
Grated cheese – 2 tbsp
Herbs – as per your choice

Zucchini Fritters healthy evening snacks
Zucchini Fritters

Recipe:

Grate the zucchini first and keep in a large bowl with pinch of salt. Keep aside for 15/20 minutes.

Now squeeze out the water from zucchini with your palms.
In a mixing bowl put the zucchini and add an egg, salt, crushed pepper, chopped garlic, 1 tsp olive oil, any herbs and mix it.
Then add corn flour and all-purpose flour and make a dough, consistency like cookie dough.

Grease your pan with remaining oil and heat it. Take small portions of the batter and put it in the pan while giving a circular shape like fritters. Cook for 2/3 minutes. Then flip off and cook the other side.

Serve hot with mayonnaise or English mustard sauce.

Friday, 2 June 2017

Ingredients:

Broccoli florets – 1 hands full
Baby spinach – 2 hands full
Spring onion – 2/3 full
Chopped onion – 1 tbsp
Butter – 2 tbsp
Nutmeg powder – 1 pinch
Cinnamon powder – 1 pinch
Salt
Crushed black pepper
Fresh cream – 2 tbsp
Roughly chopped walnut – ½ cup
Milk – ½  cup (optional)
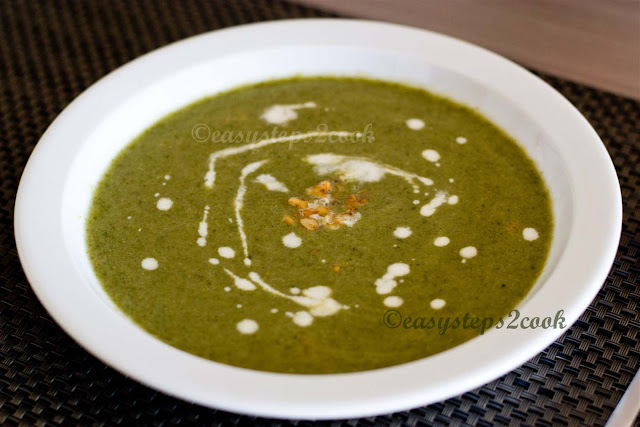
yummy crunchy broccoli soup with walnut easy recipe
Crunchy Broccoli Soup


Recipe:

Take a heavy bottom pan and heat 1 tbsp butter.
Add chopped onion and sauté it.
Add all green vegetables and occasionally stir for mixing.
Add 1 cup water and let it boil for 7-8 minutes.
Let it cool down and put this in blender and blend it.
Take a nonstick pan and put the remaining butter and fry the walnuts till golden, here you can use any types of nut like almond, cashew whatever you have. This nuts will give crunchiness.
Now remove nuts from the pan and pour the blended broccoli in it.
Time for seasoning, add salt and pepper.
Add nutmeg and cinnamon powder for nice aroma.
Let it boil for 2 minutes, in this stage if you feel the need to make it thinner, you can add milk.
Switch off the gas. Add cream and mix it well.
Add fried walnuts and serve in a bowl.
Your broccoli soup is ready.

This is one of my child's favourites. Another favourite soup of my daughter is Pumpkin soup. Both these soups are yummy and healthy. These are completely home made, so no added flavour or preservatives. Let me know how it turned out at your end. Happy cooking J

Friday, 26 May 2017

Potato smiley….yppee; what a mouthwatering tentative snacks for kids, rather to us also. And it is very much available as a frozen ready to cook item in any grocery shop. But these are not healthy and we have to say them good bye now. I tried it at home to make fresh smiley and it is very easy and off course very healthy. So this is the perfect time to say no to frozen food and enjoy  your healthy life.

 Ingredients:

Boiled potato – 2 large
Corn flour – 3 - 4 tbsp
Egg – 1 (optional)
Salt
Bread crumbs – 2 tbsp
All-purpose flour – 2-3 tbsp
Black pepper powder
Oil – for deep fry
Straw
Round cookie cutter
 
homemade easy potato smiley recipe for kids
Potato Smiley

Recipe:

At first smash the boiled potato.
In a mixing bowl take the boiled potatoes and smash them. Take egg (optional), salt, pepper powder and mix very well with smashed potatoes.
Add bread crumbs, it will give crunchiness.
Add all-purpose flour and corn flour both as per your need for binding to make a dough.
Now keep it in fridge for 15-20 minutes.
Keep on a butter paper and cover with one more paper.
Roll out like roti but it should be thick like 1 cm.
Take a round cookie cutter or whatever you have to make the cut out of a face.
Take a straw and make both eyes and with spoon edge make smiley face.
Now your smiley is ready for frying.
Heat oil in a pan and fry the smiles.

Serve hot with tomato ketchup.